in

Grandma’s cherry delight recipe

Some recipes carry more than just flavor—they carry memories, stories, and a whole lot of love. That’s exactly what makes Grandma’s cherry delight recipe such a treasure. Passed down through generations, this creamy, fruity dessert has graced family gatherings, Sunday dinners, and holiday tables for decades. It’s a no-bake layered treat that combines a buttery graham cracker crust, a smooth cream cheese filling, and a crown of glossy cherry pie topping for the ultimate nostalgic indulgence.

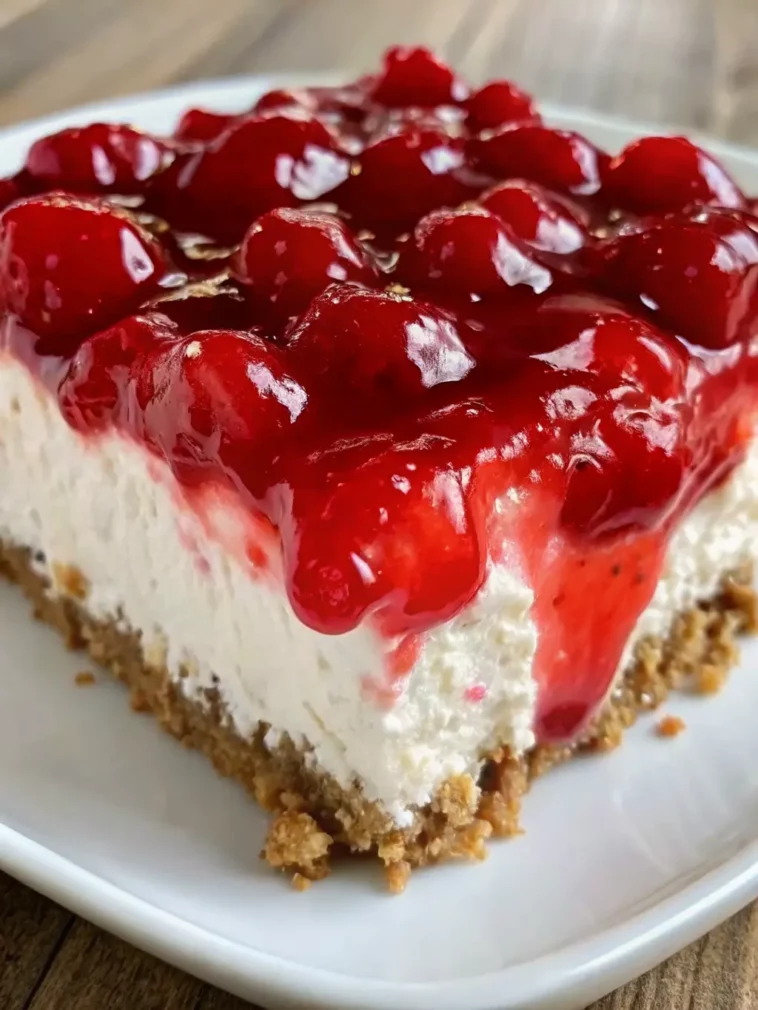
Grandma’s Cherry Delight Recipe: A Sweet Nostalgic Treat Worth Savoring

This cherry delight recipe is everything you want in a comfort dessert: rich, creamy, tangy, and sweet with a refreshing fruity finish. It’s the kind of dish that gets scraped clean at potlucks and always prompts someone to ask, “Can I get the recipe?” With minimal prep and simple ingredients, it’s easy to understand why this dessert has stood the test of time.

Unlike complicated layered desserts that require baking or tempering, Grandma’s cherry delight keeps it simple. The crust is press-and-go, the filling is whipped to smooth perfection, and the cherry topping is straight from the can—no need to reinvent what already works beautifully. It’s a practical, foolproof dessert that even beginner home cooks can nail on the first try.

Whether you’re looking to relive childhood memories or want to share a sweet slice of family tradition with your loved ones, this cherry delight recipe is a must. It delivers big flavor with little effort and is just as perfect for summer picnics as it is for cozy winter gatherings. Give it a try, and you’ll see why Grandma never showed up to a party without it.

Grandma’s Cherry Delight Recipe That Everyone Will Remember

This cherry delight recipe is a classic no-bake dessert that layers a buttery graham cracker crust, creamy whipped filling, and sweet cherry topping. It’s simple to make and always the first dessert to disappear at any gathering—perfect for every season and every sweet tooth.

Storage Options

Store your cherry delight in the refrigerator, covered tightly with plastic wrap or in an airtight container. It will stay fresh for up to 4–5 days. For longer storage, you can freeze individual squares for up to 2 months. Thaw in the fridge overnight before serving for best texture and flavor.

Summary

This cherry delight recipe is a timeless no-bake dessert that’s light, creamy, and bursting with cherry flavor. It’s ideal for potlucks, holidays, and weeknight cravings, with just a few ingredients and no oven required. A perfect make-ahead treat with nostalgic flair.

Equipment

  • 9×13 inch baking dish
  • Mixing bowls
  • Electric hand mixer or stand mixer
  • Rubber spatula
  • Measuring cups and spoons
  • Plastic wrap or foil (for chilling)

Ingredients

For the Crust:

  • 2 cups graham cracker crumbs
  • ½ cup unsalted butter, melted
  • 2 tbsp granulated sugar

For the Filling:

  • 1 (8 oz) package cream cheese, softened
  • 1 cup powdered sugar
  • 1 tsp vanilla extract
  • 1 (8 oz) container whipped topping (like Cool Whip), thawed

For the Topping:

  • 1 can (21 oz) cherry pie filling

Instructions

  1. Prepare the Crust: In a bowl, mix graham cracker crumbs, melted butter, and sugar until well combined. Press the mixture firmly into the bottom of a 9×13 inch dish to form an even layer. Chill in the refrigerator while preparing the filling.
  2. Make the Cream Cheese Filling: In a mixing bowl, beat softened cream cheese until smooth. Add powdered sugar and vanilla extract and beat until well combined. Gently fold in the whipped topping until smooth and fluffy.
  3. Assemble Layers: Spread the cream cheese mixture evenly over the chilled crust. Use a spatula to smooth the surface.
  4. Add Cherry Topping: Spoon cherry pie filling evenly over the cream layer. Gently spread to cover.
  5. Chill and Set: Cover the dish and refrigerate for at least 4 hours or overnight to allow the layers to firm up.
  6. Serve: Slice into squares and serve chilled.

Notes

  • Be sure the cream cheese is softened before mixing to avoid lumps.
  • You can use homemade whipped cream instead of store-bought whipped topping, but stabilize it with powdered sugar.
  • If you’re making it in advance, add the cherry topping just before serving to preserve the clean look of the layers.

Tips for Success

  • Press the crust firmly with the bottom of a glass to get a compact base.
  • For a slightly tangier filling, add a tablespoon of lemon juice to the cream cheese mixture.
  • Let the dessert chill fully to ensure clean slices. Overnight chilling is best.
  • Wipe your knife between cuts for neater presentation.

Additional Tips and Variations

  • Fruit Swap: Use blueberry, strawberry, or raspberry pie filling instead of cherry for a twist.
  • Crust Options: Try crushed vanilla wafers or digestive biscuits instead of graham crackers.
  • Mini Servings: Layer the dessert in individual jars or cups for party-friendly portions.
  • Nutty Base: Add ¼ cup finely chopped pecans or walnuts to the crust mixture for added texture.

Frequently Asked Questions (FAQ)

Can I make cherry delight ahead of time?

Yes, it’s perfect for prepping the night before an event. It tastes even better the next day.

Can I use fresh cherries instead of canned pie filling?

You can, but you’ll need to cook them down with sugar and cornstarch to create a thick, sweet topping.

What can I substitute for Cool Whip?

You can use homemade whipped cream stabilized with powdered sugar or a mascarpone whipped topping.

How long does cherry delight need to chill?

At least 4 hours, but overnight is best for clean slices and flavor development.

Conclusion

This cherry delight recipe is proof that simple ingredients can create something extraordinary. Creamy, fruity, and nostalgic, it’s the kind of dessert that connects generations and brightens every table it graces. Once you take that first bite, you’ll understand why it’s been a cherished family favorite for decades—and why it will become one in your home too.

For Ingredients And Complete Cooking Instructions Please Head On Over To Next Page Or Open button (>) and don’t forget to SHARE with your Facebook friends