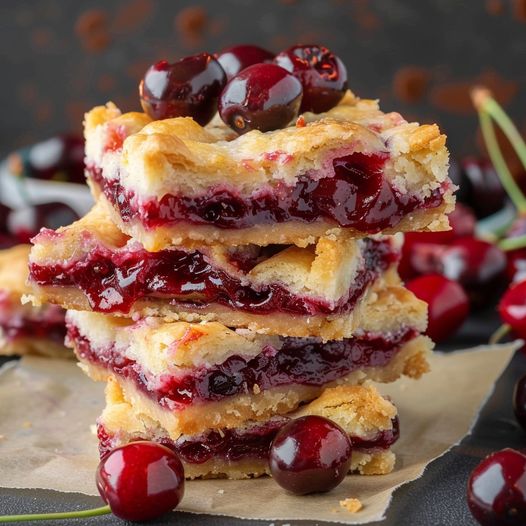
Christmas Cherry Bars are a festive, vibrant treat that brings holiday cheer to every dessert table. With their bright red cherry pie filling, buttery almond-scented crust, and simple glaze drizzled on top, these bars are a perfect combination of sweetness and nostalgia. They’re ideal for cookie exchanges, family gatherings, or as a make-ahead dessert during the holiday rush. What makes them special isn’t just the festive color and flavor—it’s how simple they are to prepare while still making a beautiful presentation. Each bite delivers the tart sweetness of cherries balanced by a rich, soft crust that holds everything together. These bars are a holiday staple that will quickly become a tradition in your home, just like they are in so many family kitchens.
Storage Options
Once cooled and glazed, store the bars in an airtight container at room temperature for up to 3 days. For longer storage, refrigerate them for up to 5 days. You can also freeze the bars (un-glazed is best for freezing) by layering them between sheets of parchment paper in a freezer-safe container for up to 2 months. Thaw overnight in the fridge and add glaze just before serving.
Summary
Christmas Cherry Bars are soft, buttery dessert bars filled with cherry pie filling and finished with a simple powdered sugar glaze. These eye-catching treats are easy to slice, serve, and share, making them perfect for holiday parties and festive gatherings.
Why You’ll Love This Recipe
They’re colorful, delicious, and incredibly easy to make. The buttery crust pairs perfectly with the sweet-tart cherry filling, and the drizzle of icing adds just the right touch. They can be cut into small or large bars, travel well, and always bring a cheerful pop of red to the dessert table.
Kitchen Equipment You’ll Need
Mixing bowls
Electric mixer
Measuring cups and spoons
Rubber spatula
9×13-inch baking pan
Parchment paper (optional, for easy removal)
Wire rack
Tips for Success
Don’t overmix the dough to keep the texture light and tender. Spread the cherry filling evenly across the dough for consistent flavor in every bite. Let the bars cool completely before glazing to avoid a runny mess. Lining your pan with parchment paper helps lift the bars out easily for clean slicing.
Ingredients
1 cup unsalted butter, softened
1 3/4 cups granulated sugar
4 large eggs
1 teaspoon vanilla extract
1/2 teaspoon almond extract
3 cups all-purpose flour
1 teaspoon baking powder
1/2 teaspoon salt
1 can (21 oz) cherry pie filling
For the Glaze:
1 cup powdered sugar
1/2 teaspoon vanilla extract
2–3 teaspoons milk (more as needed for desired consistency)
Directions
Preheat the oven to 350°F (175°C). Grease or line a 9×13-inch pan with parchment paper. In a large bowl, cream together the butter and sugar until light and fluffy. Add eggs one at a time, beating well after each addition. Stir in vanilla and almond extracts. In a separate bowl, whisk together the flour, baking powder, and salt. Gradually add dry ingredients to the butter mixture until combined. Spread two-thirds of the batter into the prepared pan. Spoon the cherry pie filling evenly over the batter. Drop remaining batter by spoonfuls over the top of the filling. Bake for 35–40 minutes, or until golden brown and set. Let the bars cool completely on a wire rack. For the glaze, mix powdered sugar, vanilla, and milk until smooth, then drizzle over the cooled bars.
Additional Tips or Variations
Substitute raspberry or blueberry pie filling for a different twist. Add slivered almonds on top before baking for added crunch. Use clear vanilla for a whiter glaze, or add festive sprinkles to match the holiday theme. These bars also make a great edible gift when wrapped in holiday tins.

