I purchased:
- 2 packs of single robe hooks
- 2 sheer curtain panels, they were $4.97 each!
- 2 spools of translucent white ribbon
- Sewing machine (I used my sewing machine for this but you could easily hand stitch, or potentially even use fabric glue or iron on binding, just be cautious if using heat, this material is pretty delicate)
Sometimes a little extra effort to save a few bucks is worth it to me! If you’d rather skip this step, buying tab top panels will definitely save a good bit of time!
Determine How Many Tabs You WantI started by figuring out how many tabs I wanted. My panels were 59” wide, I went with 7 tabs, this will also be the number of hooks you will need! My window was 57” across for reference. I cut 7 8” strips of ribbon, folded them in half, and pinned them evenly across the top of the curtain panel. I placed a straight stitch across the ribbon to attach it to the curtain for the “tabs”. This is obviously more time consuming but cut the cost of each panel in half! My panels ended up costing $6 each!
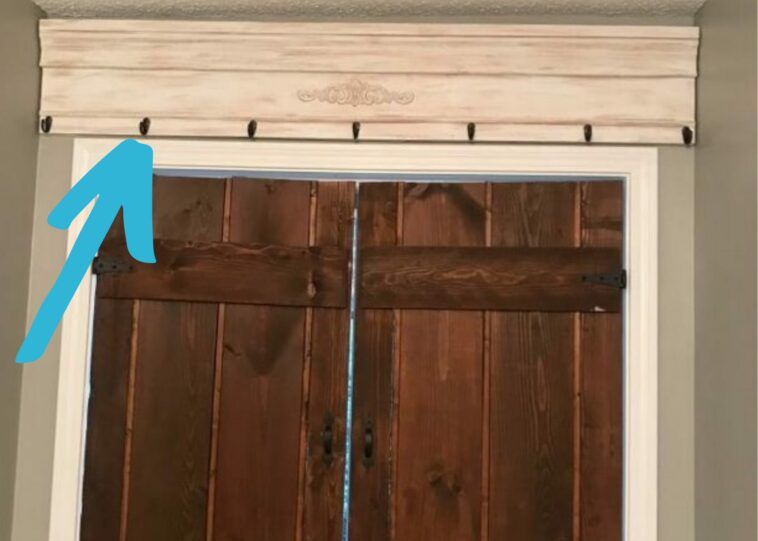
MeasureI had this piece of wood from an old headboard project I disassembled begging to be used for something. I cut it to the length desired, in my case 59”. You’ll want it to extend past your window frame if possible, You’ll see in later photos that my window is almost as wide as my wall so I cut the board to fit wall to wall. Attach your robe hooks across the board, spaced evenly… I won’t lie, I used the measuring tape at first but ended up more or less eyeballing the placement, because in all honesty, sometimes I just don’t like math, surely someone else can relate? No?
Screw into the WallI used self tapping wood screws and screwed this bad boy straight into the stud! I patched the hole with a little wood filler and a dab of touch-up paint. But if you prefer, you can use whatever type of bracket on the back to hang this with! Make sure it’s level!
I had such a hard time taking these shutters down, they were one of the very first DIYS I did when I bought this home, I made them completely out of scraps and pallets, and was also back when I had very little skill with a saw! So, needless to say, I’ll be hoarding these in my garage until I figure out how to repurpose them 😉 haha!
Attach Curtain PanelsAttach both curtain panels loops to the hooks one on top of the other, then pull each curtain to the side of the window. I used some of the same ribbon I had left over from the “tabs” to make little tie backs and used a simple cup hook screwed into the corner to hold the curtains where I wanted them.
This is the finished look! But it still seemed to be missing something! The window sill needed a little extra impact. I ran back out to the scrap pile and found a piece of pine tongue and groove I had left over from my laundry room project and it was the perfect width to create a simple ledge!
Add a Window SillThe little extras, my plant friends, needed somewhere to hang out. This scrap piece of pine tongue and groove to fit over my window sill to give them a ledge to hang out on! This room has the best light in the house, so all of my house plants pretty much hang out in my bathroom, which is the whole reason for the updated widow treatment. My chandelier blocked the shutters from opening and my babies need sunshine! Haha
Add Battery Operated CandlesThese battery operated candles are the best. They have 3 options with the switch on the bottom, on, off and a timer! The timer setting is a little vague but I think its on 8 and off 16 hours? They come with a remote and also have optional colors! So nifty! I’m obsessed!
I’m loving this view, I will definitely be making more use of my tub now that its all done up. Is it me, or does this make the term “garden tub” make so much more since? I would love to hear what you all think! I have one more home decor tutorial coming this month, check out my instagram for sneak peeks @redsrusticworkshop !