There are desserts, and then there are life-changing dessert experiences. This Giant Reese’s Peanut Butter Cup Pie firmly plants itself in the latter category. Imagine the iconic flavor combination of chocolate and peanut butter that makes Reese’s cups so irresistible, but magnified into a showstopping pie that will draw gasps of delight when you bring it to the table.
Why You Need to Try This Giant Reese’s Peanut Butter Cup Pie
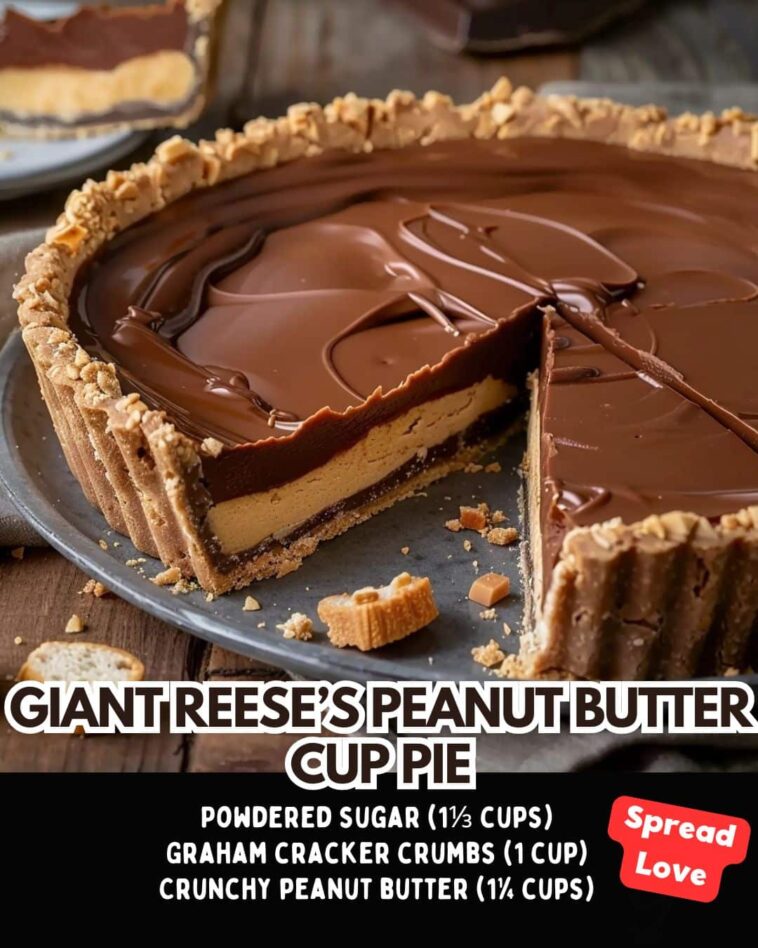
This supersized confection transforms the beloved candy into a decadent dessert masterpiece that satisfies the most intense chocolate-peanut butter cravings. The beauty of this pie lies in its perfect balance: a buttery chocolate cookie crust that provides the ideal foundation, a velvety peanut butter filling that melts on your tongue, and a glossy chocolate ganache topping that adds a touch of sophistication.
What makes this recipe truly special is its versatility for any occasion. It’s impressive enough for holiday gatherings and celebrations, yet comforting enough for family movie nights or when you simply need a spectacular pick-me-up. The make-ahead nature of this dessert means you can prepare it when convenient and have it ready to dazzle guests or family without last-minute stress.
For those who collect signature recipes – the ones friends and family consistently request – this Giant Reese’s Peanut Butter Cup Pie will quickly earn its place in your repertoire. It strikes that perfect balance between homemade charm and professional appearance, making you look like a pastry chef with relatively straightforward techniques.
Perhaps most importantly, this dessert taps into nostalgia. That first bite instantly transports you back to childhood joy – that magical moment of unwrapping a Reese’s cup – but elevated into a more sophisticated experience. The familiar flavors are there, but the textures and presentation create something entirely new and exciting.
Whether you’re a dedicated peanut butter enthusiast, a chocolate aficionado, or simply someone who appreciates show-stopping desserts, this Giant Reese’s Peanut Butter Cup Pie deserves a place in your baking repertoire. It’s not just a dessert; it’s a celebration of one of the most beloved flavor combinations of all time.
Giant Reese’s Peanut Butter Cup Pie
This Giant Reese’s Peanut Butter Cup Pie transforms the classic candy into a magnificent dessert spectacle. With its chocolate cookie crust, creamy peanut butter filling, and rich chocolate ganache topping, it perfectly captures the iconic flavor combination that has made Reese’s cups a beloved treat worldwide. This pie doesn’t just serve dessert – it delivers an experience, creating a moment of pure indulgence that chocolate and peanut butter lovers will remember long after the last slice disappears. Perfect for special occasions or whenever you crave something extraordinary.
Summary
Preparation time: 30 minutes
Chilling time: 4 hours (minimum)
Total time: 4 hours 30 minutes
Servings: 10-12
Difficulty: Medium
Equipment
- 9-inch springform pan
- Food processor (for crust)
- Medium saucepan
- Mixing bowls (various sizes)
- Electric mixer (stand or hand)
- Spatula
- Measuring cups and spoons
- Microwave-safe bowl (for ganache)
Ingredients
For the Chocolate Cookie Crust:
- 24 chocolate sandwich cookies (like Oreos), filling included
- 5 tablespoons unsalted butter, melted
For the Peanut Butter Filling:
- 2 cups creamy peanut butter
- 8 oz cream cheese, softened
- 1 cup powdered sugar
- 1 teaspoon vanilla extract
- 1/2 teaspoon salt
- 2 cups heavy cream
- 1/4 cup granulated sugar
For the Chocolate Ganache Topping:
- 1 cup semi-sweet chocolate chips
- 1/2 cup heavy cream
- 1 tablespoon corn syrup (optional, for shine)
For Garnish:
- 8-10 mini Reese’s peanut butter cups, chopped
- 2 tablespoons chopped peanuts (optional)
Instructions
For the Crust:
- Spray a 9-inch springform pan with non-stick cooking spray.
- In a food processor, pulse chocolate cookies until finely ground.
- Add melted butter and pulse until mixture resembles wet sand.
- Press mixture firmly into the bottom and about 1 inch up the sides of the prepared pan.
- Refrigerate crust for at least 30 minutes to set.
For the Peanut Butter Filling:
- In a large bowl, beat cream cheese and peanut butter with an electric mixer until smooth and well combined.
- Add powdered sugar, vanilla extract, and salt. Beat until fully incorporated and fluffy.
- In a separate bowl, whip the heavy cream and granulated sugar until stiff peaks form.
- Gently fold the whipped cream into the peanut butter mixture in three additions until fully combined.
- Spread the filling evenly into the chilled crust.
- Refrigerate for at least 2 hours.
For the Chocolate Ganache:
- Place chocolate chips in a medium heat-proof bowl.
- Heat heavy cream in a small saucepan until it just begins to simmer.
- Pour hot cream over chocolate chips and let sit for 1-2 minutes.
- Whisk until smooth and glossy. Add corn syrup if using.
- Allow ganache to cool slightly until thickened but still pourable.
- Pour ganache over the chilled peanut butter layer, smoothing to the edges.
- Return to refrigerator for at least 1 hour.
For Finishing:
- Remove the sides of the springform pan.
- Garnish the edge of the pie with chopped Reese’s cups and peanuts if using.
- For clean slices, dip a sharp knife in hot water and wipe dry between cuts.
Notes
- For best flavor, use high-quality peanut butter without added stabilizers.
- The pie needs at least 4 hours of total refrigeration time, but can be made a day ahead.
- For a firmer texture, the pie can be frozen for 30 minutes before serving.
- Bring refrigerated pie to room temperature for about 10 minutes before serving for optimal texture.
Storage Options
- Refrigerator: Store covered in the refrigerator for up to 5 days. The texture is best within the first 3 days.
- Freezer: This pie freezes beautifully for up to 2 months. Wrap individual slices or the whole pie (minus any garnish) tightly in plastic wrap, then aluminum foil. Thaw overnight in the refrigerator before serving.
- Make-Ahead: This dessert is perfect for preparing 1-2 days before an event. Add the garnishes just before serving for the freshest appearance.