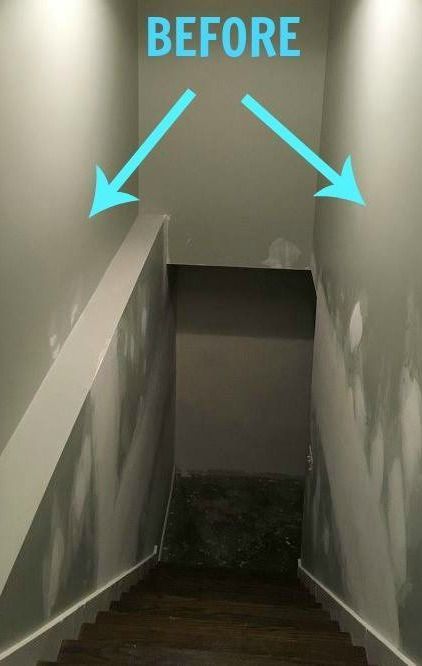
We have the world’s ugliest stairwell that USED to have a ceiling mount fixture. The burned out light bulb had NEVER been changed.
As we were doing some renovations in the house, I decided to take down the current dining room pendant light and replace it with a chandelier. Thus, I had a handy, dandy, LONG, hanging light on my hands.
As I tripped down the stairwell for the millionth time, I realized
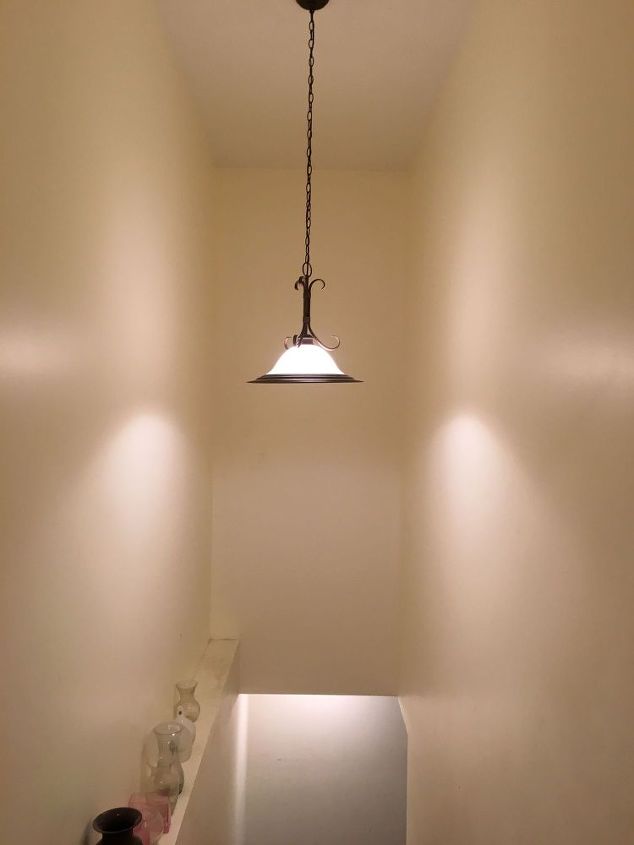
Pendant light moved from dining room
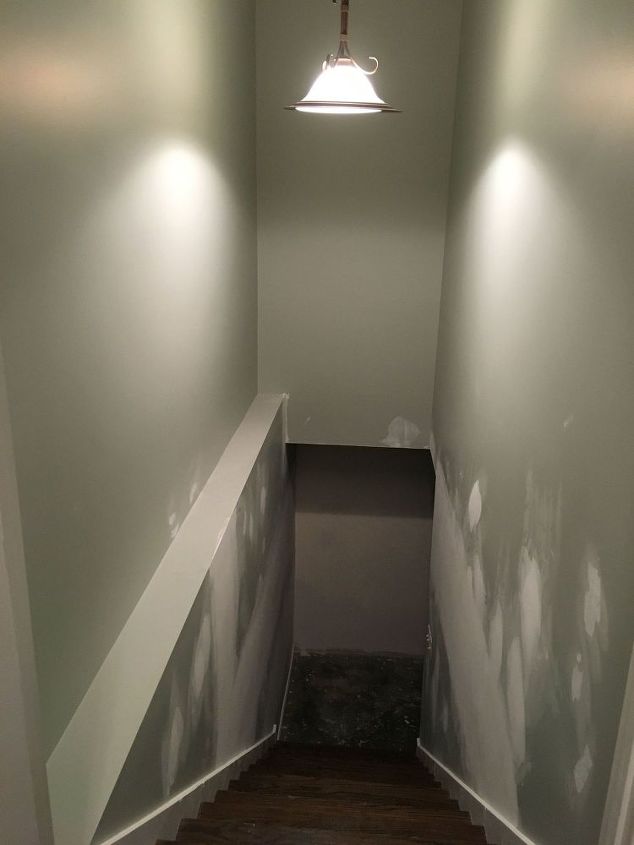
Once we had the light in place, we found that the walls were battered and nasty. Since we had 10′ ceilings in our house, the top of the wall was almost 20′ in the air from the bottom of the stairwell, the ‘landing’ was in the actual basement. We had no flat floor space to even attempt to set up any kind of a expandable ladder.
However, the walls HAD to be fixed and painted now that people could actually see them. Again, we chose to bring in a professional painter to manage the task. If you have scaffolding, you could do this yourself, but given our lack of proper tools, it was well worth it to outsource this task!
Even after our first 2 coats of paint, we had to again patch and fixed the drywall that had been beat over the years.
I scoured the house for every photo and collage I had of the kids, family, etc. I found over 28 things to hang, including 3 shelves. I also got out the old photo albums to get some of the older family pics out on display and ended up purchasing another 6 collage frames that would hold another 36+ photos. All in all, I spent about 1/2 a day collecting and making the new collages with the help of my awesome hubby.
Then, I started out by creating the arrangement as I saw it in my mind, on the floor of the living room. It was huge! I spent another 2 hours arranging and re-arranging. I measured the wall space and realized I could spread out a bit more, so I re-arranged yet again!
Finally, I found the arrangement that would work and called in another painter who had scaffolding and all the tools to do the hanging work for us – again, this could be done by anyone, but we thought it would be smartest if we had help. Please know, if you don’t have a potential 20 foot fall, this would be a lot easier!


It was an amazing transformation. The light may now be too low, but I still have the problem of needing to be able to change the light bulb so it is going to stay in place for now!

I know you get cannot up close and personal to all the pics, but the wall SHOWS you our fabulous family and I can feel the love pouring out of each and every grouping of photos – so in my mind, the feel overcomes the lack of being able to see all the pics close up!
Thanks for taking your time to view and read. I’d love any feedback you have!
