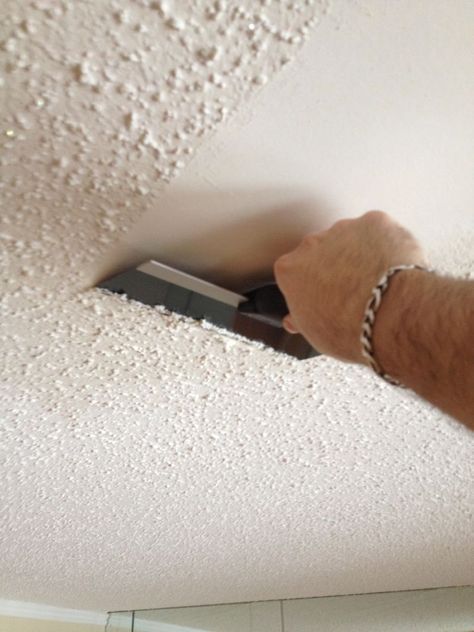
I surprised my wife by having her walk in from a long day at work to find me covered in sloppy wet oatmeal-like popcorn ceiling plaster and the furniture all over the house, but she wasn’t mad and it turned out to be a very easy DIY project!
***((Warning: Popcorn applied before 1978 MUST BE TESTED for asbestos and other chemicals common to the product in the 60’s/70’s. You do NOT want those fibers floating around the room to be ingested. If it’s asbestos based, you should have a professional come in to take care of it. Some municipalities have codes against you doing it yourself, for safety reasons.))***
Popcorn ceilings were really popular back in the day, although many people had them sprayed on to hide defects in the ceiling, supposedly-deaden sound, or give that “cozy” appearance to a room that was a little too barren. Either way, I don’t believe that have any place in a modern home, and must be removed immediately!
Ours was actually sprayed circa 2001, so it came off fairly easily and the ceiling drywall was already primed white above it, making it even more easy. Many times, you’ll find cracked Sheetrock, failed joint compound, edging tape coming loose etc. If any cracks are apparent, moistening some joint tape before applying to the crack, then compound over it until it’s smooth. It’s the best remedy – short of installing new drywall!
For Ingredients And Complete Cooking Instructions Please Head On Over To Next Page Or Open button (>) and don’t forget to SHARE with your Facebook friends