Given that we were in the process of restoring our back deck what better time than now to install an awesome water feature.

Determine layout
On this deck all existing structure was maintained we simply redid the top deck boards post and rails. This little corner angle happened to be the perfect location for what I had in mind.
On this deck all existing structure was maintained we simply redid the top deck boards post and rails. This little corner angle happened to be the perfect location for what I had in mind.

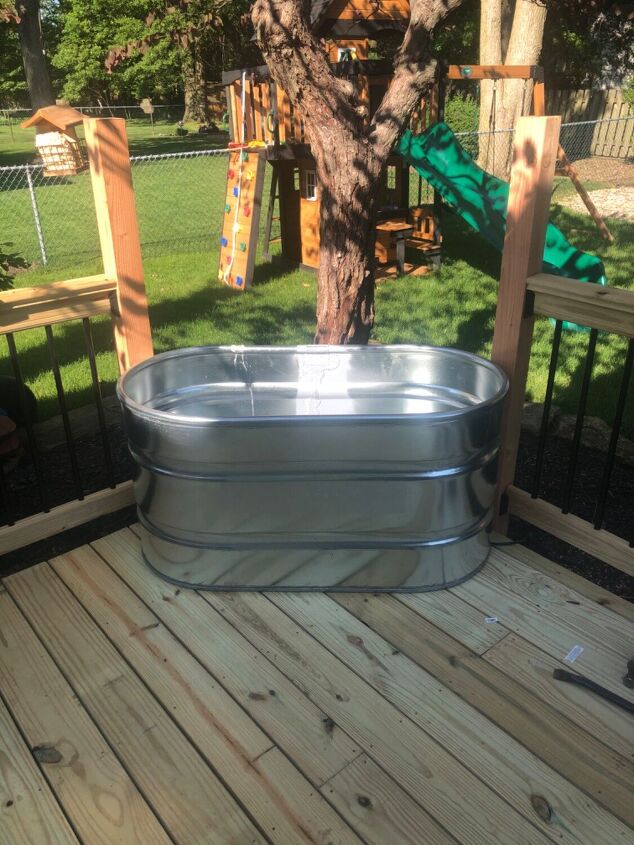
Test fit
Using a 4ft water trough I positioned between the two post to make sure it would fit as intended without taking up too much deck space. This sizing was perfect.
Using a 4ft water trough I positioned between the two post to make sure it would fit as intended without taking up too much deck space. This sizing was perfect.

Making braces
Using a 2×6 I cut to the width between the two post. I laid the 2×6 on top of the post carefully aligning and marked the angles. Using a jigsaw I cut out each corner this allowed the brace to slide tightly between each post. I then made 2 additional exactly the same.
Using a 2×6 I cut to the width between the two post. I laid the 2×6 on top of the post carefully aligning and marked the angles. Using a jigsaw I cut out each corner this allowed the brace to slide tightly between each post. I then made 2 additional exactly the same.

Drilling for plumbing
With the first brace in place I held the spillway in place to make sure the inlet fell in the center. Knowing the size of the tubing I then drilled a 1 1/2 inch hole.
With the first brace in place I held the spillway in place to make sure the inlet fell in the center. Knowing the size of the tubing I then drilled a 1 1/2 inch hole.

Second brace
With the first brace now secure with hole drilled I visualized how far I wanted the overflow to be. To high left the potential to splash causing water loss and leaving the deck constantly wet. To low took away from the sound and effect. I believe I stuck around 16inch from top of trough. I secured second brace at this height. Then cut the notch out for the spillway.
With the first brace now secure with hole drilled I visualized how far I wanted the overflow to be. To high left the potential to splash causing water loss and leaving the deck constantly wet. To low took away from the sound and effect. I believe I stuck around 16inch from top of trough. I secured second brace at this height. Then cut the notch out for the spillway.

Set spillway
Set spillway in notch cutout in previous step slightly tilt it forward to assist in water flow. Ising the third brace place on top to secure spillway in place with a little pressure. I then ran my tubing through the hole and connected the spillway to the pump placed in the bottom of the trough.
Set spillway in notch cutout in previous step slightly tilt it forward to assist in water flow. Ising the third brace place on top to secure spillway in place with a little pressure. I then ran my tubing through the hole and connected the spillway to the pump placed in the bottom of the trough.
Video Player is loading.
Test run
With everything in place and hooked up I added a little water into the trough and gave it a test run. This allowed me to make sure I had the proper size pump to feed the spillway. In my case for the 24inch spillway a 700 gallon per hour pump was plenty.
With everything in place and hooked up I added a little water into the trough and gave it a test run. This allowed me to make sure I had the proper size pump to feed the spillway. In my case for the 24inch spillway a 700 gallon per hour pump was plenty.

Back view
View from the back to show how simple the plumbing connections are. This will be covered using a galvanized metal for easy removal to drain water of make repairs if needed.
View from the back to show how simple the plumbing connections are. This will be covered using a galvanized metal for easy removal to drain water of make repairs if needed.
To Keep Reading Please Head On Over To Next Page Or Open button (>) and don’t forget to SHARE with your Facebook friends