Need a way to spruce up your patio or yard?
I really needed a way to spruce up this bare spot in front of a fence in my yard. I have a bunch of plants and not enough room on my deck for all of them, so I decided to make a set of vertical cinder block planters, or planter sculpture.
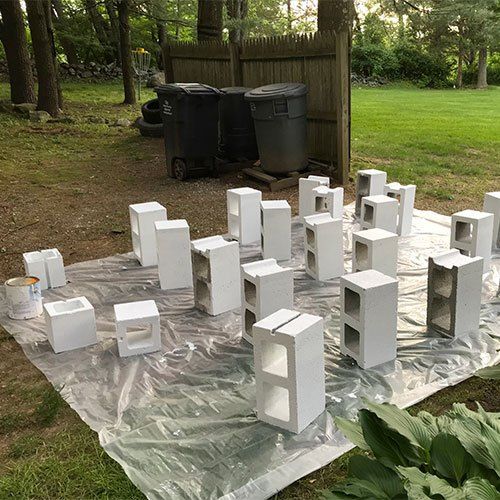
diy vertical cinder block planters sculpture
STEP 1To see my other outdoor decor and planter posts, check out Artsy Pretty Plants.
First, set up your cinder blocks in the arrangement you want your final planter layout to be. Make sure to take a photo of your layout.
Count how many of the block holes will require plants, then plan for one piece of landscape fabric and chicken wire per hole, as well as soil and the plant. If you are placing your blocks in your yard, make sure it is a level spot, or you will need to make it level.
Hint: Make sure you do this step first. I set up my layout after painting them and the paint hadn’t fully cured so I had to repaint many spots. You will avoid having to add extra time if you decide on your layout first.
diy vertical cinder block planters sculpture
STEP 2The blocks need to be washed. You can spray off most of the dust with a hose, but you will need to spot wash, using the nylon scrub brush where you see dirt. If you have a pressure washer, use it and skip the hand washing.
Wash the blocks on a driveway or paved surface, not on grass or you will end up doing extra work. Make it easier on yourself and stack a few blocks to use as a table so you aren’t bending down the whole time. They will be wet when you put them on the drop cloth.
Don’t let them sit in a pool of water, move them around if necessary or they will take much longer to dry. If it’s sunny, stick them in the sun for speedier drying.
Don’t start priming and painting these if it will rain before you are completely finished, unless you are working in covered area. Moisture will get in and make it very difficult to paint and the tackiness may not go away for quite a while.

STEP 3For priming, make sure the blocks are completely dry, otherwise the paint will peel off from the moisture leftover in the blocks. Apply the primer with one of the 9″ rollers. I used the second roller for applying the paint since it’s so difficult to get primer out of rollers.
After about an hour when the primer is no longer tacky, flip over and paint the remaining edges and sides. If your cinder blocks have grooves on the sides, use the foam brush to get between them.
Hint: It’s not necessary to prime or paint any of the bottoms or insides. I primed and painted the insides of the ones that would be visible, but didn’t like the way it looks. You are welcome to do so, but you will likely need more than 1 gallon of primer and paint.

STEP 4After 4 hours, your primer should be dry enough for your blocks to be painted (check the manufacturer’s instructions). Painting may require more than one coat. I did 2 coats and probably really needed a 3rd because I didn’t have the forethought at the time to get my primer tinted.

The 3rd coat I ended up doing after the planters were in place, just before planting- and that worked out fine.
Do you like cement and concrete projects? To get tips and details on concrete mixes, sheens, sealers and more, check out the cement tests post I did!

STEP 5Once the paint is dry, you are ready for the landscape fabric. Go ahead and flip over all the blocks that you counted that are being planted. I had 10 actual blocks that were getting plants, but 11 holes since the top block was getting plants in both holes.
Cut out the landscape fabric so that it covers the hole and goes up to about 1/4- 1/8″ from the outside edges. ** I didn’t do this- I cut my fabric pieces a little too short which made them difficult to glue.
Measure the size of that piece you just cut. This will tell you what size to cut the bottoms for the rest of the cinder block planters to. Next, apply the glue to the bottom. It should be about 1/4″ wide strip all the way around.
Construction adhesive takes 24 hours to cure, but after a few hours, you should be safe to position your blocks again. *However, it’s important to wait a day before you actually plant your plants.

STEP 6The weight of the soil when wet can be quite heavy and may be too much weight for the landscape fabric. To combat this, reduce some of the weight using the wire mesh.
Cut the chicken wire to about the size of the hole in the block and then cut a split into each corner do it folds more easily. Wearing work gloves, fold over the edges so that when the mesh is inserted it doesn’t pierce the fabric.
The goal is to get the wire mesh to basically catch on the sides of the cinder block.

FINAL STEPAdd soil and your plants!
