Nowadays they don’t seem to sell the type of headboard that I’m looking for. They are too small, come with a head and footboard, or too bulky. For a smaller room I can’t have something as large as what I could find in a store or online…and then the price is crazy.
So as I was putting drapes up in one room I knew I had to get rid of a ton of blinds. They are in good shape so I really didn’t want to just throw them out so yes……I stored them. I’m glad I did because it hit me…shiplap is all the rage right now…and with all crazes, it will not be as cool in a year or two, so why pay the price for the wood when I can do it out of blinds. They are perfectly level, no warps, knot holes, etc. Plus the best part is that this headboard will not weigh a ton and need to have huge wall anchors to attach it.
So away I went to the proverbial drawing board. What can I put these slats on? I want to keep it light…foam board. I got 2 packages (a set of 2 so 4 total) at Walmart for 3.50 each set. I only needed 3 foam boards but it was cheaper this way. Plus, I’m thinking of making a second one for a gift if this turns out the way I hope.
I used just about everything that I had on hand in the house. If you needed to buy all of these items your cost would run about $40. And that includes purchasing some horizontal blinds.
So here we go…..

So here are the basic items I’m using. Vertical blinds, foam board and 3 colors of paint. Not pictured is Gorilla glue to attach the slats to the foam board, a drywall saw to cut the edges of the slats, duct tape and some scissors. Set aside a full day or if you need two, make sure you have enough space to store everything.

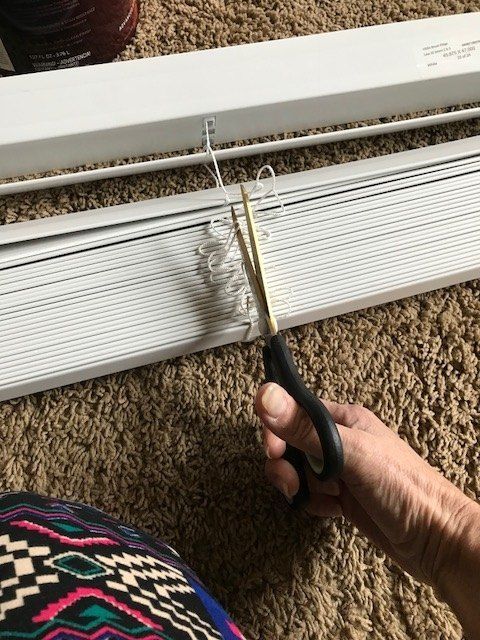
First you need unleash your slats from their string. This is very easy and you only need to cut one side and then they will all be free. do this on a floor or table that keeps everything flat. If you don’t, the slats will fall everywhere….I know that now. 


All the slats will have two holes in them where the string went through. I chose to snap those off just to see what type of edge I would get. I was really hoping to get a nice straight edge….but no. Off to the saw. Now to save yourself some time, unless your saw is in your work area, you will want to measure off each slat and how it will be positioned on your foam boards. My saw and where I was working are not even close and as much as I need to get my stair climbing in, I didn’t want to make 50+ trips up and down the stairs.

So I moved on to the next step…setting up the foam boards. I needed to cover a queen bed so I needed 60 inches. Which is perfect since each foam board was 30 X 20. I wanted them to be 30″ tall so that is why I have 3 boards in my project. You may only want it to be 20 inches tall and then you would only need to use 2 foam boards. It’s completely up to you.
I used white duct tape but that is just what I had on hand. You can use any color since it’s going to be covered by the slats. I did both sides just to give a bit more support while working on the project.

Once the foam boards were taped together I started placing the slats on the foam boards just to see what things were going to look like and if I liked what I was seeing….I did. I also plan on painting the slats but that I will show you later on.
You may also notice that at the top of board I have a decorative piece…yep that is the valance that they put on vertical blinds. It gives a nice finished touch.

So this next step is time consuming. It took almost 2 hours just to do the set up. Yes I have every piece labeled by row and placement. This is, in part, due to not having my saw in my work area. If you are working in a garage and have a saw right there, you won’t need to do this step as you can cut as you go. But note: if you are not gluing as you go, you will still want to label all of your pieces. Since I’m painting before gluing…I need everything labeled.
As part of my set up, I did mark on the foam boards, the exact placement of my first row of boards so I know exactly where each one is supposed to start and end. Once that row is set, everything else will fall into place.
That step may not be necessary but I really didn’t want to make a mistake in that first row since everything will be off if I do.
after I painted each of the pieces it was time to start gluing. This process went really fast. I was actually surprised but all my pre planning paid off.
NOTE: If you plan on gluing all at one time, use a glue that has a longer set up time as the foam board will warp due to the moisture of the glue.
I didn’t have that type of glue so due to that, I opted to do the gluing in sections. I did 1/3 of the board. Flipped it over so the slats were on the floor and put a little bit of weight on it to keep it flat. I gave it about an hour then did the next sections the same way.

So the finished product is up and I’m happy with it. I did need to use a few more command strips than I thought I would. It was heavier than I expected but still lighter than using all wood. It was quick and easy too.